Summary
– Protect the room
– Prepare the wall to lay wall tile
– Choose the cross-braces and mortar glue
– Step 1: Prepare the mortar-glue powder
– If the wall you are tiling is made of plaster
– Step 2: Glue the wall
– Step 3: Lay the first tile
– Step 4: Place the braces
– Step 5: Lay the whole tiles
– Step 6: Check the regularity of the wall tile
– Step 7: Gluing the cut tiles
– Step 8: Make the tile joints
The wall tile is laid on a clean, dry, solid, and perfectly flat wall.
When the wall is ready, i.e., its holes are plugged, and it has been cleaned, here are the steps to install the wall tiles: prepare the adhesive, spread it on the wall, and install the tiles.
Protect the room
Typically, installing wall tiles causes a lot of dust and dirt (splashes of grout or glue, etc.).
To facilitate the cleaning of the finish and avoid damaging the surrounding surfaces, it is preferable to protect the floor and furniture before installation. This step will save you time when cleaning the job site, and you will be able to work more serenely.
Empty the room
It is advisable to empty the room as much as possible of its objects, decoration, and furniture to free up space and protect all your belongings. Remember to remove or unhook anything that is obstructing the wall where you will be laying your tiles: shelves, sockets, etc.
Protect your furniture and appliances
For all furniture and appliances that you could not remove from the room, you can cover them with:
– protective tarpaulins;
– old sheets;
– or polyethylene type films.
Note: In roll form, polyethylene film is straightforward to handle and install on appliances or furniture. It is available in various thicknesses. Count about $30 for a roll of 160 m².
Protect the floor
Tile adhesive or grout projections are common during the installation of the new wall covering. To avoid walking on it and having to strip everything afterward, take the time to protect your floor.
To do so, please take the time to protect your floor:
– Place tarpaulins, used sheets or blankets, or polyethylene film on the parts of the floor that are likely to be soiled.
– Hold the elements covering the floor with masking tape.
– Attach the masking tape to the protective element and the baseboards to not damage your floor covering.
– Remember to tighten the tarpaulins to avoid getting your feet caught in them.
Good to know: tarpaulins and protective films are commercially available in various sizes. Count about $3 for a 4×5 m tarpaulin.
Once your room is well protected, you can prepare your support (filling, washing) and then to the laying of the wall tiles.
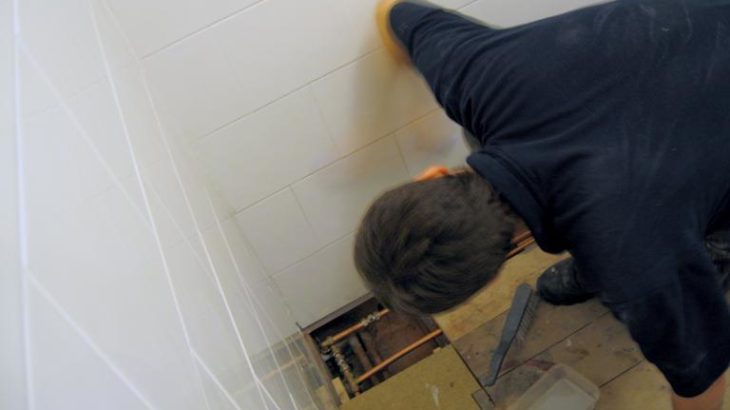
Prepare the wall to lay wall tiles
Before installing wall tiles, you will need to have your wall prepared:
– To install wall tiles on a plaster wall, check its solidity and fill any holes and cracks.
– To install wall tiles on a wall covered with wallpaper, first remove the wallpaper.
– To install wall tile on a painted wall, first sand or strip the paint.
– To install wall tile on an already tiled wall, you must re-adhere loose tiles and remove broken tiles.
– If you lay your tiles on a cement or cinder block wall, fill any holes and cracks with cement or filler. Then clean the wall. It is ready to be tiled.
– Then, calculate the number of tiles you will need and plan how to lay them (this is called the layout).
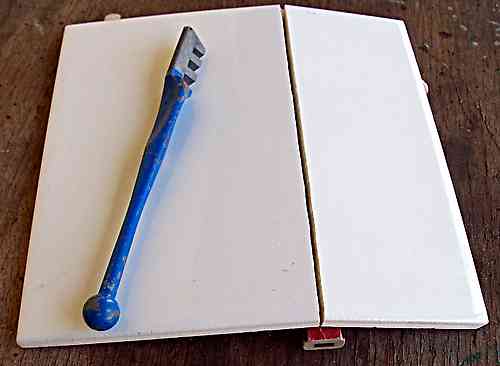
Choose the cross-braces and mortar glue
The crossbars
The spacers are used to define the joint spacing during the installation of the wall tile. The width of the joints depends on the size of the tiles:
– For tiles with 10 cm sides, allow a joint spacing of 2 to 3 mm.
– For tiles with 20 cm sides, allow a joint spacing of approx. 3-5 mm.
– For tiles with 30 cm sides, allow a spacing of 5 mm.
– Choose your crossbars according to the joint width you want.
Tip: the crossbars can be supplied in sheets. In this case, remove them before starting to lay the tiles to save time during the laying process.
The adhesive mortar
There are different types of tile adhesives (tile adhesive) adapted to the type of tile you are laying and the rooms you are tiling (terrace, bathroom, kitchen, etc.).
– Choose your mortar according to the room you are tiling and the type of tile to be laid.
The mortar is sold ready to use in a bucket or as a powder to be diluted in water.
1. Prepare the dry-set mortar powder
– In a trough, dilute the powder in water, respecting the proportions indicated on the packaging.
– Mix with a stick without whipping the mixture to avoid trapping air bubbles. Mix slowly.
– If you need to prepare a large quantity of glue, use an electric mixer or a drill equipped with a mixing paddle to mix. Set the mixer or drill to a slow speed.
– You should get a soft paste, liquid enough to work with but not so liquid that it will run.
If the wall you are tiling is plaster
If the wall you are tiling is made of plaster:
– Make small notches in the wall using a scraper (or you can use a cat’s tongue trowel). They will allow the mortar-glue to adhere better.
– The notches should not be deep.
2. Glue the wall
Once the mortar-glue is ready, glue the wall:
– Divide the wall into areas of about 1m². You will glue these surfaces gradually to prevent the mortar from drying out before you have laid all the tiles.
– Using a spatula, lay the thin-set mortar on the first square in an even layer of about 1 cm.
– Using a notched trowel, smooth and then groove the adhesive vertically and horizontally. This operation allows the tiles to adhere better.
3. Laying the first tile
Once the mortar adhesive is evenly distributed on the surface and streaked, lay the first tile:
– Lay the first tile at the location you planned during the layout stage (planning of tile installation).
– Press lightly on the tile to secure it.
The wall tile is installed from the bottom, using a nailed cleat. The installation of this strip will have been done at the time of the layout planning.
Tip: If the tiles were not stored in their packaging, clean them with a brush and a slightly damp cloth to remove dust before installing.
4. Place the lattices
Install spacers at the top and bottom corners of each tile to define the tile joint spacing.
– Press them lightly to secure them to the wall.
– Remember to remove the spacers before the adhesive dries completely.
Note: you can purchase spacers that can be “embedded” in the mortar.
Install the whole tiles
Once the braces are placed at the corners of the first tile, lay the next tiles:
– Lay the entire tile in the order you established during the layering step.
– Place braces at the corners of each tile.
– Do not over-drill the tiles.
– Clean any traces of glue from the tiles with a damp sponge that is frequently rinsed.
– When you have laid all the tiles on the same surface, glue the next surface and continue laying the tiles.
– Once all the tiles have been laid, there are still gaps at the edges that will need to be covered with cut tiles. Do not apply thin-set mortar to the edges before cutting the tiles, as it may dry out.
6. Check the regularity of the wall tile
Regularly check the verticality and horizontality of your work with a spirit level. If the tiles are off-set, gently push them in to align them, being careful not to pull or push them in.
– Use a rubber mallet (a hammer with a rag will also do) and a wooden bat or a wooden plank.
– Place the bat (or plank) at an angle on several tiles at a time.
– Tap the bat with the mallet to level the tiles.
7. Gluing the cut tiles
Once you have laid the whole set of tiles, there are small spaces left on the wall called the edges. You will need to cut some of the tiles to size and tile the edges.
How do I cut tiles?
You can cut the tiles manually, with special pliers, or with the help of a machine: a tile cutter, an angle grinder, or an electric tile cutter.
Laying the cut tiles
Cut tiles, or edge tiles, are the tiles laid to cover the small spaces left after all the full tiles have been laid.
Glue the back of the edge tiles:
– Using a notched trowel, apply glue to the center of the cut tile.
– Spread the glue in ridges with the trowel.
– Place tiles in the intended location.
– Press down lightly to glue them in place.
– Place spacers at the corners of the tiles. If necessary, cut the cross braces’ branches to shorten them, making it easier to place them between the tiles.
– Place a wooden bat at an angle over the tiles and tap with a rubber mallet to level them with the rest of the tile.
– Once you have finished laying wall tiles, allow drying. It takes an average of 24 to 48 hours for the thin-set mortar to completely dry.
8. Grouting the tile joints
The joints ensure that the tiles are watertight. It is essential to grout the tiles correctly: water can easily infiltrate non-waterproof tiles, and the tiles may peel off.
Materials for laying wall tiles
|
Trough |
From $2. |
|
Tiler’s bat |
$10 approx. |
|
Croisillons |
$2 approximately |
|
Mallet |
$4 approximately |
|
Electric mixer |
From $30 ($20 for the drill, $10 for the mixer) |
|
Adhesive mortar |
Approx. $20 for 25 kg |
|
Bubble level |
From $4. |
|
Mason’s bucket |
About $2. |
|
Notched spatula |
$3 approximately |
|
Trowel |
From $4 |
Do you want to read more on Building Pros?


