Summary:
– Tips for working with tadelakt
– Step 1: Prepare a tadelakt
– Step 2: Prepare the media
– Step 3: Make the first layer of tadelakt
– Step 4: Make the second layer of tadelakt
– Step 5: Make the topcoat
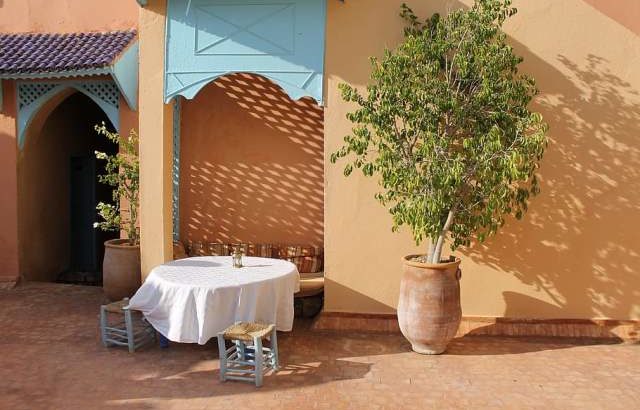
Coated with ecological lime, tadelakt comes from Morocco, where it is often used in hammams, fountains, ponds… Its impermeability and water tightness make it a very popular coating in water rooms.
Putting tadelakt on a wall is a delicate thing to do. It is important to observe the steps and techniques of installation to ensure perfect waterproofing. Start with a small area to test, because tadelakt is made in one go to avoid unsightly connections.
Tip: for a traditional tadelakt, use lime from Marrakech, a mixture of lime (aerial, hydraulic) and minerals (sand, clay…).
Tips for working with tadelakt:
– Work in temperate conditions, the ideal temperature being between 10 and 18 °C to avoid too fast drying and crackling of the tadelakt.
– To tint the tadelakt, respect the dosages indicated for each preparation, so as not to saturate it.
– Tadelakt can be applied on all types of supports (rough and porous), except on those already coated with cement or painted with a synthetic resin. On plaster, the lime may flour and peel off. An undercoat of mineral paint is then essential.
– Remove the glossy or satin paint and apply an undercoat of mineral paint before applying the tadelakt.
Materials to put tadelakt on the wall

Float, Pigments, Trowel, Drill with mixing whisk, Trough, Filler, Abrasive paper, Sprayer, Polishing roller, Liquid black soap and Brush.
1) Prepare a tadelakt
In a mason’s trough or bucket, mix a volume of Marrakech lime with 70% water using a trowel or a mixing tip adapted to a drill.
To make a tinted tadelakt:
– Add natural pigments or oxides (about 5 to 15 % of the volume), more or less according to the desired shade (the mixture lightens as it dries) and without saturating the milk.
– Remember to weigh the dose carefully and note it down to eventually find the same shade in case of lack.
– Mix with a whisk or the mixing tip to obtain a uniform shade.
Let the mixture stand for 24 or 48 hours in a cool, dry place.
2) Prepare the substrate
Prepare the wall during the resting time of the preparation.
– If the support is not uniform (bricks, cob, cinder blocks …), cover with a whitewash before applying the tadelakt.
– Fill the cracks and the consequent holes with a filler.
– Sand and dust to obtain perfectly clean and smooth walls, as with any paint.
– Moisten the surface with a sprayer the night before or a few hours before application.
3) Apply the first coat of tadelakt
The next day, mix the preparation well so that it is homogeneous and evenly tinted.
– Using the trowel, apply a first coat of plaster 5 mm thick.
– Even out the surface by pressing firmly on the trowel.
– Allow setting.
4) Apply the second coat of tadelakt
When the first coat begins to set (the finger feels it and leaves no trace), apply the second coat of coating of the same thickness with the trowel.
– Smooth the plaster well in circular movements, but do not press too hard to avoid lime laitance.
– Let it set.
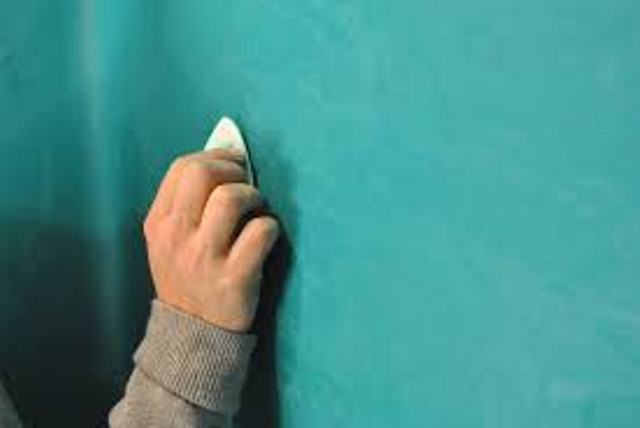
– Tighten the tadelakt with the polishing roller, that is to say, apply the roller on the plaster small areas by small areas and in circular movements.
– Insist on the cracks and crevices to block them. When drying, if new cracks appear, pass the roller over the area again.
5) Apply the topcoat
The next day, dilute a little black soap in water (about 20% per litre).
– Apply this solution to the wall with a flat brush and rub it in with the polishing roller, always in small areas by small areas and in circular movements.
– Allow drying completely before using the room, if it is a bathroom: from 48 hours to several weeks depending on the size of the building site and the nature of the work (walls, showers…).
Hope the above tips help you out. However, doing the tasks above may not always be easy for the common layman, unless you are a good DIY enthusiast. So, should you be looking for rendering services across the eastern suburbs of Melbourne, the name to remember is Crown Solid Plaster. They can handle any form of rendering projects such as House Rendering, Venetian Plaster, Commercial Rendering, Foam Cladding, traditional rendering, Venetian plaster colours, and moulding supply & installation.
Please, remember to leave your comments in the section below.


