9 Steps to Build a Concrete Slab
Summary
– Step 1: Prepare the slab site
– Step 2: Dig the ground
– Step 3: Lay the hedgehog
– Step 4: Make a formwork
– Step 5: Set up the expansion joints
– Step 6: Lay out the reinforcement
– Step 7: Calculate the amount of concrete needed
– Step 8: Case 1: Mix the concrete manually
– Step 8: Case 2: Mix the concrete with a concrete mixer
– Step 9: Pour the concrete slab
A concrete slab is often needed for garden landscaping, such as creating a deck or installing a large above-ground pool.
Making a concrete slab outside is not very complicated but requires organization and good ground preparation. Indeed, before pouring the concrete, it is necessary to dig the ground, install a bed of rubble and sand, and set up a formwork.
Here are the materials and steps required to build an outdoor concrete slab.
Materials needed to make a concrete slab.
Tarp
Concrete mixer
Calculator
Gardener’s line
Manual tamper
Geotextile felt
Expansion joints
Tape measure
Grinder
Mortar
Spirit level
Shovel
Wooden stakes
Wooden boards
Rake
Aluminum ruler 2 m
Sand
Jigsaw
Smoother
Welded wire mesh
1. Prepare the site of the slab
If necessary, start by leveling the ground and then mark out your slab:
– Place wooden stakes at the 4 corners.
– Connect the stakes with a rope and stakes planted at each corner.
2. Dig the ground
Prepare your slab by digging the ground:
– with a shovel for a small area: 10 m² maximum;
– with a mini-shovel for a large surface: this equipment is available for rent.
To know the appropriate depth, add:
– the thickness of the gravel layer: from 8 to 10 cm for a slab reinforced with reinforcement;
– the thickness of the reinforcement;
– the concrete layer: 15 cm for a concrete slab reinforced with reinforcement (recommended).
Dig the ground to the required depth.
3. Lay the hedgehog
The layer of gravel/gravel placed at the bottom of the slab is called a hedgehog. It provides strength and stability to the slab.
For a slab reinforced with reinforcement (the most recommended):
– Place a bed of rubble 10-12 cm thick.
– Spread the rubble well over the entire surface of the slab with a rake.
– Place a mixture of sand and gravel about 3 to 5 cm thick on top.
– Tamp it all down with a manual tamper or a tamping machine (available for rent) depending on the surface area concerned.
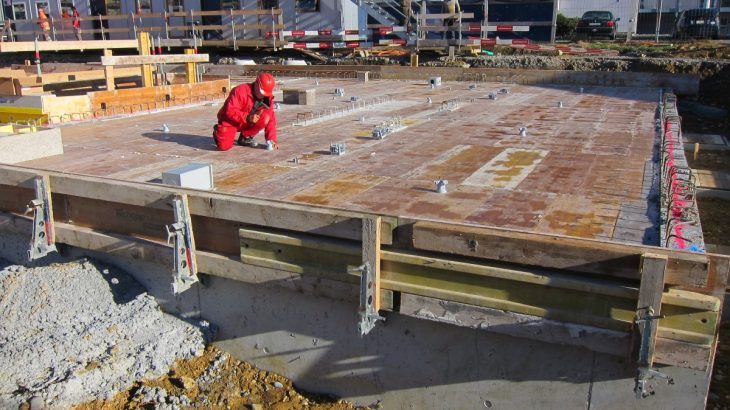
4. Make a formwork
The formwork makes it possible to delimit the slab and contain the concrete until it is scorched. It is essential for an outdoor slab.
– Equip yourself with boards equal in width to the depth of the slab and 27 mm thick so that they can withstand the pressure generated by the concrete.
– Cut the boards with a jigsaw to the size of the perimeter of the slab.
– Place the boards in the recess, making sure there are no gaps at the corners.
– Reinforce the formwork by driving stakes behind the boards.
– Check the level of the formwork with a spirit level.
Good to know: in the case of an uncovered terrace, the formwork must be slightly sloped to allow rainwater to run off: 1 cm/m maximum.
– Finally, place a polyethylene film at the bottom of the formwork:
◦ It will prevent rising dampness.
◦ It must be large enough to cover the inner face of the formwork boards.
◦ If you must lay it in several strips, overlap them 15 to 20 cm.
5. Set up the expansion joints
If your slab has a large area, plan to install expansion joints to prevent the concrete from cracking over time.
– Divide the slab into sections of about 15 m².
– Grid the slab area, spacing the expansion joints 1.80 m apart: use your 2 m long mason’s rule so that it will slide more easily.
– Ensure that the joints are maintained by placing small concrete blocks at their base.
– Allow hardening before pouring the slab.
6. Lay out the reinforcement
Reinforcement is highly recommended, especially for large slabs.
– The reinforcement must be raised: place small wedges on which you will place the mesh.
– Cut the mesh to size with a grinder:
◦ A margin of 3 cm must remain between the formwork and the lattice.
◦ If expansion joints are present, cut the mesh into as many pieces as necessary, keeping the margin.
– If more than one mat needs to be laid to cover the slab space adequately, bind them together with binding wire.
Caution: Do not bind the reinforcement of the different sections delimited by the expansion joints.
7. Calculate the quantity of concrete required
Start by calculating the surface area of your concrete slab:
Length in m × width in m = Area in m²
Then multiply this result by the height of the slab: 0.15 m for a reinforced concrete slab.
Area in m² × (Depth in m) = Overall volume of concrete to be poured in m3
Then calculate the amount of concrete needed, knowing that a reinforced slab (reinforced by a reinforcement) requires a concrete dosed at 350 kg/m3, i.e.:
– 350 kg of cement: 10 bags of 35 kg;
– 630 kg (or 420 liters) of fine sand;
– 700 kg (or 840 liters) of gravel;
– 175 liters of water.
Multiply these quantities by the total volume of concrete needed for your slab.
Tip: For ease of use, use ready-mixed concrete. This way, you avoid renting a concrete mixer! It is also possible to have ready-mix concrete delivered by truck.
8. Case 1: Mix the concrete manually
– For a large quantity of concrete, spread a tarp on the ground, near the construction site and your equipment.
– For a small quantity, use a clean wheelbarrow.
– Pour the materials onto a tarp or into a container with a bucket in the following quantities:
◦ 1 volume of cement;
◦ 2 of sand;
◦ 3 of gravel.
– Mix dry with a trowel or shovel.
– Form a crater in the center of the mixture and pour in water gradually.
– Knead the mixture and adjust the amount of water until a smooth paste is obtained.
8.2 Case 2: Mix the concrete with a concrete mixer
– Place the mixer on a stable, level surface and make sure you have your equipment nearby. Equip yourself with suitable clothing and protective gloves.
– Turn on the mixer.
– Tilt the tank back 20°.
– Pour in a bit of water first, then add the ready-mix concrete with a shovel.
If you are not using ready-mix concrete, apply the 1 – 2 – 3 – ½ rule: 1 volume of cement + 2 of sand + 3 of gravel + ½ of water.
– Let the concrete mixer work until a smooth consistency is achieved.
Read more: How Do You Spray Concrete With a Concrete Mixer
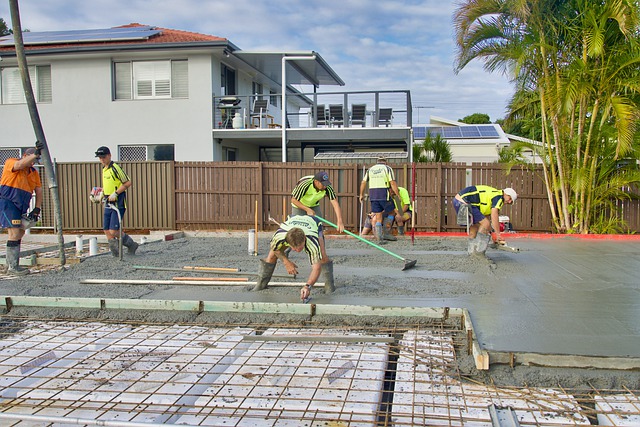
9. Pour the concrete slab
– Pour the prepared concrete into a wheelbarrow and pour it into the center of the slab.
– Spread it with a rake.
– Level the concrete with a large 2 m ruler by sliding it over the form boards and expansion joints: always pull the ruler towards you, backing and shearing.
– Continue pouring and leveling the concrete as you go.
– Once the concrete is poured and leveled, smooth it with a float in circular movements.
– Then, let it dry for at least 24 hours before removing the formwork and walking on your slab.
– You will need to wait 1 to 2 months before you can lay a covering.


One thought on “9 Steps to Build a Concrete Slab”