5 Steps to Install a Plasterboard Wall
Contents
– Focus on plasterboard
– Before installing a gypsum wallboard partition…
– Step 1: Determine the location of the wall
– Step 2: Install the metal framing channels
– Step 3: Attach the metal framing studs
– Step 4: Cut the gypsum board
– Step 5: Install the gypsum board and insulation
Plasterboard wall installation is a fairly complex operation requiring a specific installation technique. For best results, it’s best to follow the steps with caution and a degree of meticulousness.
Frequently used to delimit rooms in construction or renovation, the plasterboard partition is made of:
– a metal frame;
– two plasterboards (minimum);
– an insulator is to be placed between the plates.
Here’s how to build a plasterboard partition.
Focus on plasterboard
Thick of 13 mm, hence their name BA 13, the plasterboards exist in two widths: 90 and 120 cm, and in several heights: 250 cm, 260 cm, 280 cm, 300 cm.
There are different types of plasterboard:
– The standard boards are white.
– The waterproof boards are green.
– The fire-resistant boards are pink.
All have tapered edges to facilitate the installation of joint strips.
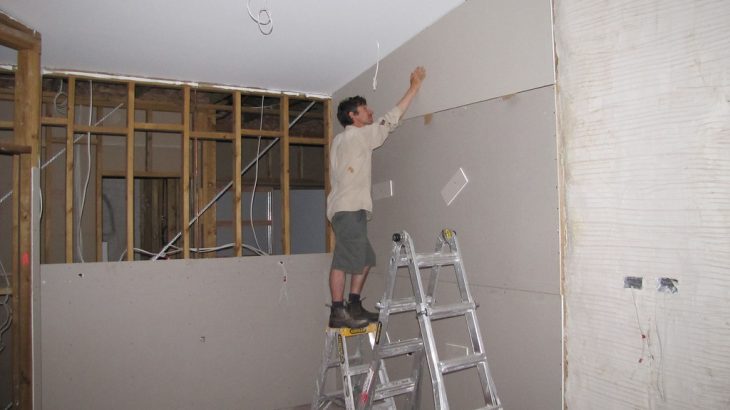
The plasterboards are attached to a previously installed metal frame composed of rails and studs. The rails are installed on the ceiling and floor, and the studs form the vertical framework.
Once installed, the gypsum board wall needs to be grouted before painting, wallpapering, or tiling.
Before installing the gypsum board wall…
Before you start installing the vertical framing, you should review the following points:
– Make sure the floor is level before you begin the installation. If necessary, level the floor.
– After purchase, be sure to store the gypsum board in a dry, flat area to prevent warping.
– Adapt the plasterboards to the room’s function: for wet rooms, prefer waterproof plasterboards.
– To fix the rails to the floor and ceiling, choose the suitable screws and plugs for the type of material: wood, concrete, etc.
Equipment for mounting a plasterboard wall
Spirit level
Plumb line
Hand saw
Chalk line
Tape measure
Cutting pliers
Screw
Hole saw
Percussion drill
Trestles
Insulation in rolls
Plasterboard
Wooden beveled wedges
Metal framing track
1. Determine the location of the partition
– Mark the location of the wall on the floor, ceiling, and adjacent walls, using a tape measure, ruler, plumb line, and chalk line.
– Make sure the alignment is correct. Also, mark the location of the opening.
Mark with crosses on the floor where the vertical studs of the metal frame will be placed; this mark helps you find your way in the space and not make mistakes at the ceiling.
2. Install the metal framing rails
– Position the first rail on the floor. If necessary, cut it to size with the cutter.
– Drill and anchor every 50 cm or so, then fasten the rail with screws.
– Do the same along the entire floor (except at the opening) and on the ceiling.
3. Attach the metal framing studs
– Along the wall, snap the vertical stud into the floor track and then into the ceiling track.
– Check its alignment with a spirit level.
– Drill and plug the stud and the wall every 50 cm, then fix the rail with the screws.
– Do the same on the other side of the wall.
– For the internal studs, insert them every 60 cm fasten them to the rails at the ends.
– At the opening:
◦ Install the vertical studs in the same way, and the door block will be attached to them.
◦ Then mount the door block before starting to install the plasterboards.
4. Cut out the plasterboards
Before installing the boards, make sure that the boards are the correct size. If not, you will have to make cuts:
– Install the plasterboard on trestles.
– Cut it out with a handsaw.
– Determine the future location of outlets and switches, and identify the passage of electrical cables or conduits. Use a hole saw to cut out the location of electrical boxes in the plates.
5. Install the plasterboard and insulation
Installing the boards on the first side of the wall
Start with a corner:
– Place one or two 1 cm thick shims on the floor along with the frame.
– Place the panel with the white side facing you on the frame, resting it on the shims.
– Screw the plate to the vertical framework with special screws every 30 cm and 1 cm from the edges.
– Make sure that the screw does not protrude or get too far in.
– Proceed in the same way on one side of the wall, cutting the plates to size if necessary.
Passing the electricity and installing the insulation
For the electrical sheaths:
– Run the conduits through the pre-drilled holes to install them in the correct location for outlets and switches.
– Make them protrude from the wall.
Install insulation panels:
– Install them inside the framing.
– Re-cut to size if necessary.
Installing the plasterboard on the second side of the wall
– Proceed in the same way as for the first side to fix the boards.
– Finally, install the electrical boxes for the sockets and switches.
Caution: during installation, be careful not to damage the electrical sheaths.
All that remains is to make the joints between the plates and plug the screw holes.


