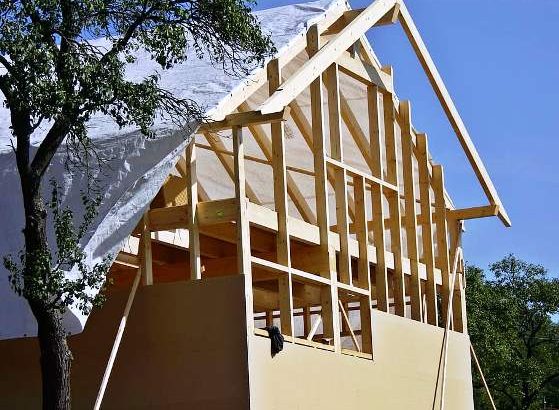
The earthwork and foundation are the first steps in a self-build project for a wooden house. The execution of this phase of the construction site requires the presence of several people as well as the rental of earthmoving equipment.
Here are the steps to carry out the earthwork and the foundations of a wooden house.
1. Set up the house on the site
Setting up the house is to position the building on the land.
Take a marker on the ground plan and position it on the land.
Good to know: the ground plan is one of the documents required for the building permit file.
Referring to this marker, place stakes at the corners of the house.
Connect them with ropes. These mark the location of the future walls of the house.
Check the squareness of the footprint, i.e., make sure that each corner is at a right angle. Applying the “3, 4, 5” rule to do this.
Good to know: the 3, 4, and 5 rule is used to check the squareness of an angle. Measure a length of 3 m on one side and mark this point. Measure 4 m on the other side and mark the point as well. The distance between the 2 points must be exactly 5 m.
2. Position the chairs on the ground
Before digging, chairs (wooden boards fixed on two stakes) must be placed on the ground. These are placed outside the perimeter marked by the ropes, which allows you to visualize the location of the building once the digging has begun.
Make the chairs by nailing a wooden board to two stakes.
Set up the chairs at least 1 m outside the lines already set up on the ground. Place them at the characteristic points of the construction.
Check their stability and level.
On each chair, drive a nail towards the middle of the board, corresponding to the outer line of the walls.
Attach ropes to the nails and stretch them between the chairs to mark the walls and corners.
Good to know: it is also possible to put 2 nails on each chair to mark the inner and outer lines of the walls.
3. Dig up the ground
Remove the topsoil
Trace the layout of the frame on the ground with spray paint.
Remove the ropes.
Remove the topsoil with the excavator over the entire site of the house. Remove the surface soil to about 10 cm, following the boundaries drawn with paint.
Good to know: depending on the slope of the land, it may be necessary to dig deeper in some places.
Check that the excavated surface is flat with a laser level.
Good to know: reserve the topsoil in a place that will not interfere with the work. It will be used to reshape the ground at the end of the work.
Dig the excavations
The excavations are intended to accommodate the footings.
The excavations are established according to the plan of the house. They are generally at least twice as wide as the wall to be built (40 cm wide at least for a 20 cm thick wall, for example), and their depth is between 50 and 80 cm.
Dig the excavations with the backhoe.
4. Place the geotextile and gravel
Install a geotextile film over the entire surface of the frame.
Spread the gravel over the geotextile.
Good to know: to work in a dry environment, installing geotextile and gravel around the frame is possible.
5. Install the ironwork
Place 4 cm thick shims (e.g., concrete blocks) on the bottom of the excavation.
Place iron brackets at the corners of the excavations, raised by the shims, to not touch the ground.
The reinforcement must permanently be embedded in concrete to a minimum thickness of 4 cm.
Install the rebar in the excavation on the brackets.
Attach the reinforcement to the angles with the reinforcing wire.
Add the top brackets in each corner. Attach them to the rebar.
Plant 4 rebar (vertical holding bars) at each intersection and corner.
Attach them securely to the rebar.
Good to know: the reinforcing bars must overlap each other (lap) over a length of 10 times their diameter.
6. Pour the concrete
This step requires the use of earthmoving equipment (pump truck and rotors) and the presence of several people.
Pour the concrete into the excavation using the pipe of the pump truck.
Following the pouring path, smooth the concrete by hand to level it. Tap the surface with a 2-meter ruler from one edge of the trench to the other.
These operations must be done quickly enough so that the concrete does not harden before smoothing is completed.
Re-attach the ropes to the chairs, using the previously planted nail as a reference.
Let dry for at least 48 hours.
7. Assemble the first two rows of cinder blocks
Lay the first cinder block
Start laying the first row in a corner.
Spread a bed of mortar 2 to 3 cm thick.
Place a corner block on top of the waiting irons.
Check for verticality with a plumb line and horizontality with a level.
Lay the next blocks
Lay the remaining blocks in a row, leaving a 1 cm gap between blocks. Align yourself with the chalk lines that mark the outside of the walls.
Attention: for construction on a wooden slab, make openings (1/500 of the floor area at least) to ensure ventilation under the slab. To do this, remove the equivalent of one cinder block from each wall.
Regularly check for verticality and horizontality.
From one row to the next, lay the breeze blocks with staggered joints.
Good to know: adapt the height of the foundations according to the ground to put the wooden slab that rests on the foundations out of the water (the wooden slab must be at least 20 cm above the ground).
8. Lay the chain-link row
Lay the cinder blocks in a U shape
Spread a bed of mortar on the second row of cinder blocks.
Good to know: to easily spread a level and even mortar bed, use guides. To do this, place 2 x 2m rulers on each side of the row of blocks and secure them with clamps.
Lay the cinder blocks in a U-shape one after the other, leaving a 1 cm joint.
Check the level regularly.
Place the reinforcement and close the formwork.
Place the reinforcement in the U-shaped blocks and bind them together.
Make a wooden cover to close the end of the last U-shaped block of the wall.
Securely hold the cover on the block with a clamp.
9. Pour concrete into the tie beam row
Mix concrete with a concrete mixer.
Pour the concrete into the entire row of U-shaped blocks and all vertical ties.
Make sure no air bubbles are left in the concrete.
Even out the levels.
Allow drying.
Once the foundation is complete, backfill the excavation with the set-aside soil.
Below is a list of materials needed to build the earthwork and foundations of a wooden house.
List of materials:
- Ready-mixed concrete
- Concrete mixer
- Spray paint
- Man head nails
- Decameter
- Concrete irons
- Geotextile felt
- String
- Plumb line
- Gravel
- Hammer
- Tape measure
- Mortar
- Spirit level
- Laser level
- Wooden stakes
- Wooden boards
- Aluminum ruler 2 m
- Jigsaw
- Clamp
- Wooden cleat
- Mason’s trowel


