Summary
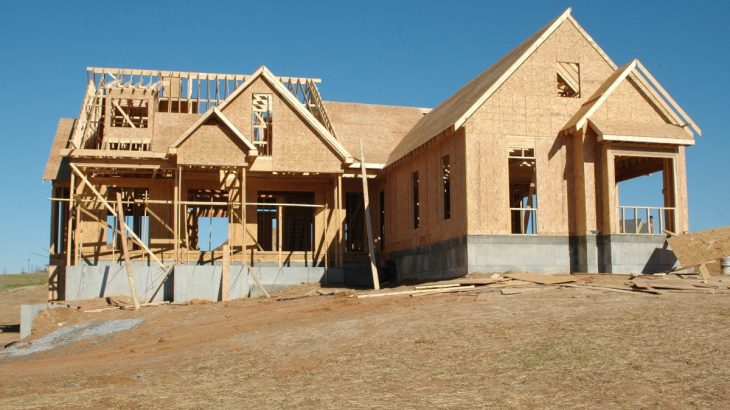
– Focus on the wood frame of a wooden house
– Step 1: Assemble the wall frame
– Step 2: Position the walls
– Step 3: Raise the walls
Assembling the frame of a wooden house is a step reserved for the most experienced. It is mounted on the house’s slab, made of concrete or wood.
In general, the framework elements are prefabricated in the workshop, according to the plans of the house. They are delivered with precise assembly instructions that you must follow. Indeed, the assembly is a technical step that requires fundamental knowledge.
Follow this step-by-step guide to assemble the frame of your wooden house.
Focus on the wood frame of a wooden house
Composition of the frame
– The frame is the wooden skeleton of the walls formed by the top and bottom rails (horizontal) and the studs (vertical).
– A headframe delimits the openings made up of a crosspiece and a lintel (horizontal), and two uprights (vertical).
– bracing panels are attached to this structure.
Assembly of the frame
There are 3 possible types of assembly:
– The wall elements are manufactured and assembled in the workshop. Each element is cut according to the plans of the house then pre-assembled in the workshop. We can thus deliver whole sections of the wall on site. A crane truck is then necessary for the assembly of the kit. This step is then quite fast.
– The elements are manufactured and pre-assembled in panels in the workshop. These panels are generally sized so that you can handle them manually. Delivered to the site, they are then assembled on site.
– The elements are manufactured in the workshop. Each element is cut according to the plans of the house. All the assembly is then done on-site. In this case, this step is longer.
Below is a small list of the material you will need.
Materials needed to assemble the frame of a wooden house

- Galvanized finish staples
- Wall stapler
- Nailer
- Man head nails
- Carpenter’s square
- String
- Bubble level
- Laser level
- Wood saw
- Clamp
- Cleat
- Lag screw
- Wood screws
- Screwdriver
1. Assemble the wall frame
If the walls have not been pre-assembled in the workshop, they must be assembled on-site according to the lifting order, carefully following the manufacturer’s instructions.
Good to know: contact a professional to ensure that the structure is correctly sized and that the assembly is solid enough to last.
The assembly is done on the ground.
– Position all the elements on the ground.
– Assemble the posts on the rails with nails.
– Form and nail the headers, then attach them to the uprights.
– Check the squareness of each header and the entire wall. Adjust the squareness if necessary with clamps.
Good to know: to check the squareness of a structure, measure the length of a diagonal with a string, and make sure the second diagonal is the same length.
– Attach the bracing panels with nails every 20 cm.
– Staple a rain screen to the bracing of the resulting wall.
– Attach battens, evenly spaced along with the height of the wall. This will form an air space while maintaining the rain screen.
2. Position the walls
– Locate each wall according to the coding provided.
According to the coding, the wall is flat on the floor so that the base of the frame is on the foundation rail when the wall is standing.
– Install a wall lift, a pulley system, which you attach at the top rail, on the flat wall. The base of the wall lift is attached to the floor.
Depending on its size and weight, it may be necessary to use a truck crane to lift the wall.
3. Raise the walls
Raise the walls one at a time, following the order of lifting.
– Raise the wall and make sure the base of the wall is still perfectly aligned with the bottom rail.
Good to know: it takes at least 2 people to do this operation.
– Maintain the wall by attaching an oblique arm (a cleat or a metal rod).
– Check the vertical with a level. Make the necessary corrections if necessary.
– Screw the wall to the bottom rail.
– Also, bind the walls together. Fasten the wall studs with lag bolts.
Finally, attach a tie beam to the top of the structure when all the walls are assembled to solidify the whole.
Read more:


